
The Delegate/Team Ring feature in Lync is used for call delegation or when you want to have certain users answer another user’s phone for call coverage purposes.
Delegates vs. Team-Call Ring Groups
The only difference between these two delegation functions is the end result upon a transfer. In the Delegates function; when the delegate transfers the call back to the delegator and the calls rolls to voicemail, the call will get returned back to the originating delegate because the system will not allow a call to go to the delegator’s voicemail. In the Team-Call function, the exact opposite is true. In this scenario the call will go to the delegator’s voicemail.
Note: If you are not sure on which function to use (delegate vs team-call, use the team-call)
To setup Team Ring, please follow these steps:
1. Open your Lync client and add all involved partys to your contacts. Since we used enhanced privacy, you cannot delegate or add someone to the Team Ring list unless you are on each other’s contact list. Remember, when you add someone to your contact list, the other party gets a confirmation to accept/deny your request. Make sure they accept your contact request for this to work.

2. Open your Lync client and navigate to the Tools > Call Forwarding Settings (the tools bar may be located in the top right corner of your Lync client that looks like a gear icon).
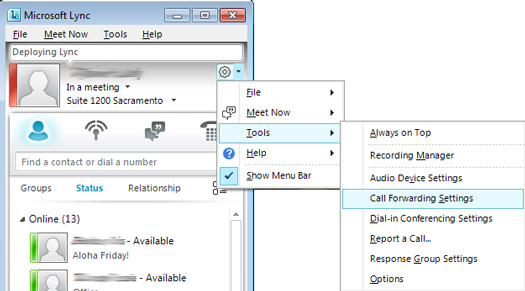
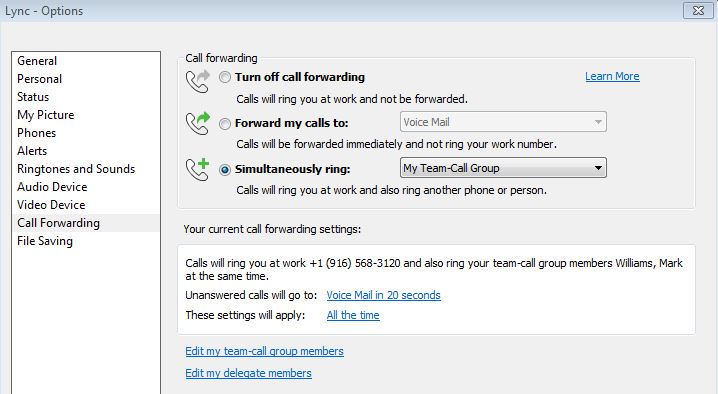
3. Under Call Forwarding, select the radio icon to Simultaneously Ring and the drop-down to My Team-Call Group.
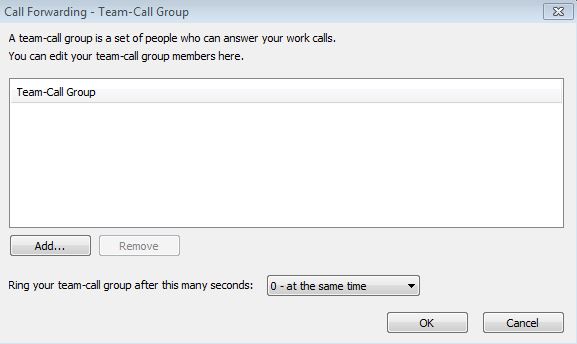
4. A new windows will pop-up. Select Add and add the people you want to answer your line. Optionally you can also set the ring delay of your team-call group member(s) in this screen. Select OK.
5. Review your settings in the review panel (middle of this window) as it will say “Your current call forwarding settings:” Ensure that the “Unanswered calls will go to” section is accurate. If everything looks accurate then select OK.
6. Test your call coverage by calling the phone you made changes on.