Microsoft Skype for Business is our phone system which allows employees to make and receive calls from anywhere. Skype for business also includes not only the physical phone but a suite of features that includes Instant Messaging, Conferencing, Presence and much more.
This guide will cover installing and signing-in to Skype for Business on your Windows, Mac OSX, Apple/Android mobile devices. For ChromeOS, please see this link Skype on ChromeOS.
Important Note: The Skype for Business client should be installed directly on your local workstation (Windows or Mac) for optimal performance. If you are using VPN/Remote Desktop, use the Skype for Business application directly from your local workstation (and not the VPN window) to prevent audio/microphone issues.
Audio Devices: With Skype, you can use your workstation, cell phone, earbuds, headphones, headset, etc to make and receive calls. When using your workstation (Windows or Mac), ensure that you have an audio device, such as speakers and microphone. As long as your headset is properly installed and connected and recognized by your workstation, it can be used with Skype for Business. Most of the time, these devices do not need additional software as they are considered “Plug-and-Play”.
The link below provides a helpful video on how to setup your audio devices.
Windows
Prior to installing the Skype for Business client on your Windows machine, check if you already have it installed. Navigate to the Start menu and look for Skype for Business icon or folder. If you do not see it, proceed to the following steps. Installing multiple versions of the client is not recommended.
If you prefer to view the video version, please visit the following Youtube link https://youtu.be/KBbzhZ4xr6Q?t=11
- Download Skype for Business at the following link
- https://portal.office.com/account/
- Login with your Los Rios credentials and select the Install Office link.
- Run the installation package and go through the steps.
- Download the voicemail integration script at the following link. Right-Click the link below and choose Save Link-As.
- Voicemail Integration Download Link
- Righ-Click the SkypeVoicemail program that was just downloaded and select ‘Run as Administrator‘. After a few seconds, you should see a black window that says “The operation completed successfully” and “Press any key to continue…”. You may close the window.
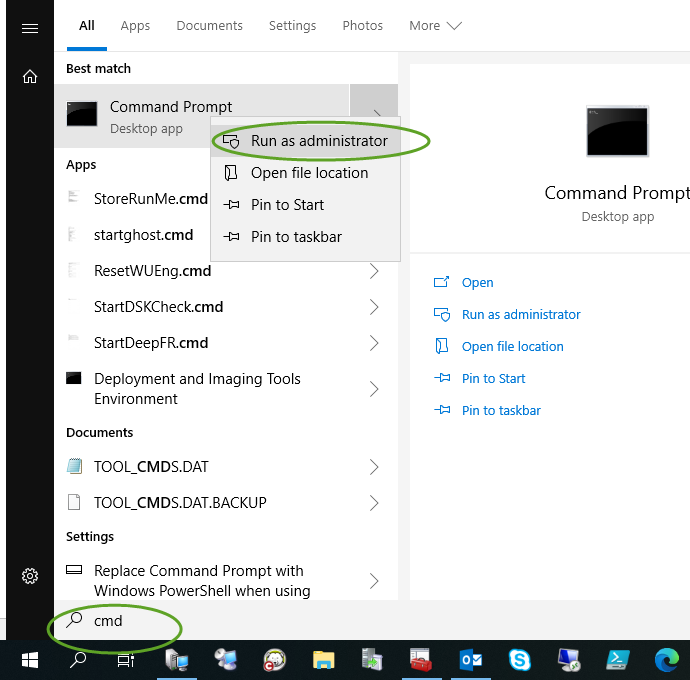
- Note: If your antivirus software flags the Voicemail Integration software as “infected” you can safely bypass this message as it’s a false-positive. However, if you are unable to do so, you can manually run the following commands in leu of the Voicemail Integration route.
- Type CMD in Windows Search and right-click on the Command Prompt and select Run as Administrator. Copy and paste the text in bold below into the command prompt windows and press Enter:
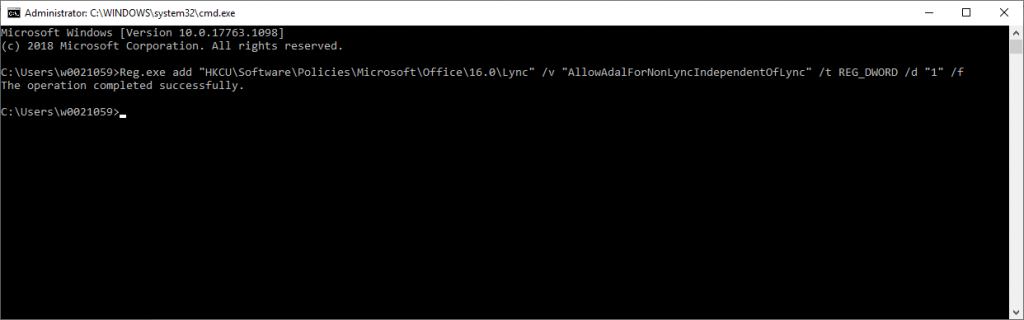
Reg.exe add “HKCU\Software\Policies\Microsoft\Office\16.0\Lync” /v “AllowAdalForNonLyncIndependentOfLync” /t REG_DWORD /d “1” /f
Reg.exe add “HKCU\Software\WOW6432Node\Policies\Microsoft\Office\16.0\Lync” /v “AllowAdalForNonLyncIndependentOfLync” /t REG_DWORD /d “1” /f
You should see the output of “The operation completed successfully”.
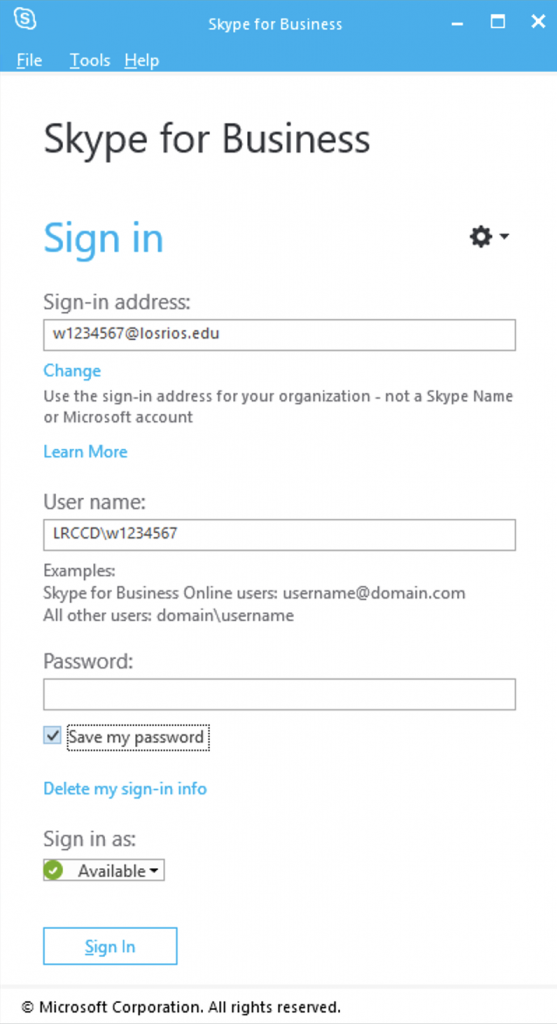
- Once completed, run the Skype for Business 2016 application.
- On the Sign-in window, the sign-in address is your W-ID@losrios.edu
- If you are prompted for the Username, use the following format LRCCD\W-ID
- The password is your standard district password.
- Once you are signed-in, you will be prompted to enter your credentials fo Exchange via the district Single Sign On (SSO) window. Input your W-ID and district password. This will allow you to review your voicemail via the Skype for Business client on your workstation.
Apple Mac OSX, iOS (iPhone/iPad) and Android Mobile Devices
If you prefer to view the video version, please visit the following Youtube link https://youtu.be/7xEC_3tiWeY
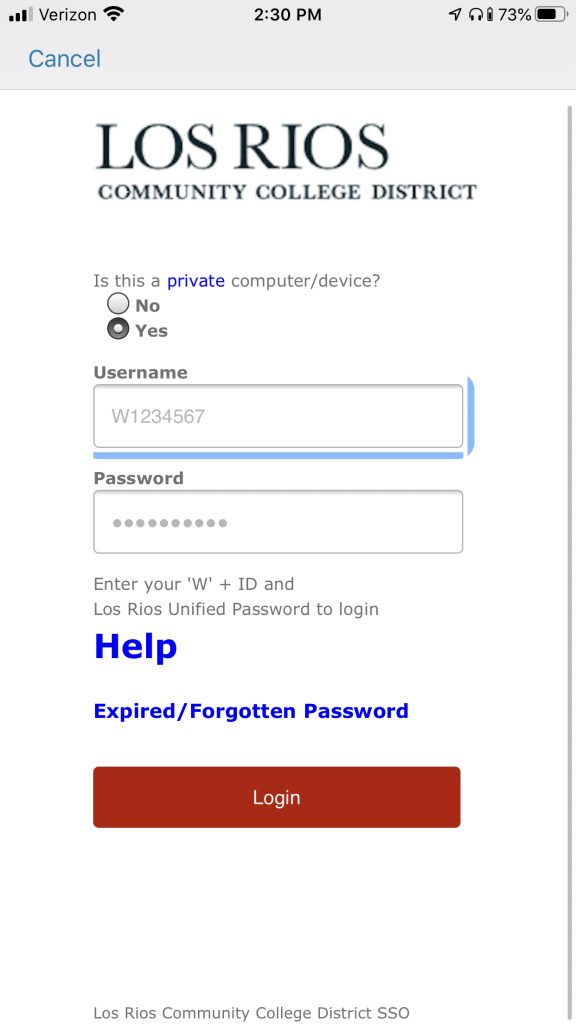
Note: The screenshots below are from an iPhone (iOS) but they apply to Mac and Android as well.
- For Apple mobile devices (iOS), open the App Store and search for and install the Skype for Business app. (Android users need to use the Android Marketplace/Google Play).
- For Mac OSX devices, you can download the app directly from Microsoft
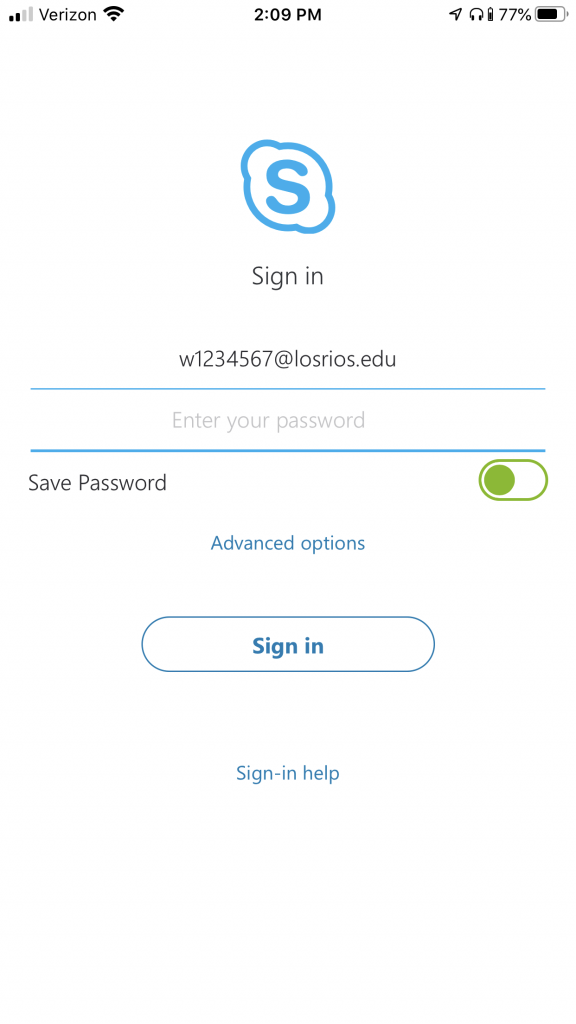
- Once installed, open the Skype for Business app. It will have the white and blue colored logo with the name Business.
- Input your W-ID@losrios.edu in the sign-in address field along with your Los Rios credentials in the field below.
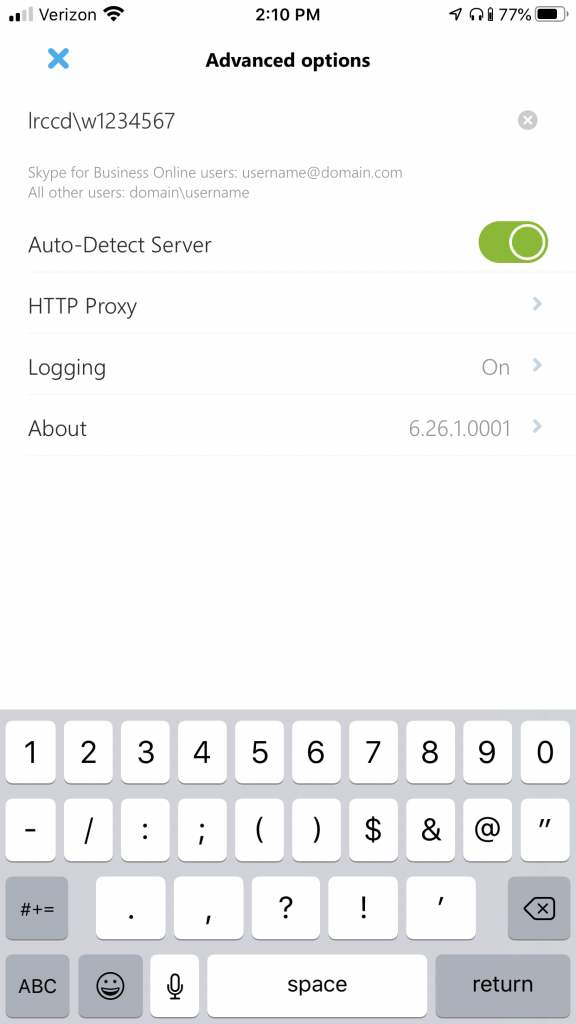
- Select Advanced options and input LRCCD\W-ID in the User Name field and select the blue X at the top left corner of the screen.
- Select the Sign-In button.
- Select the Sign in to your Exchange account to see your upcoming meetings banner. You will be prompted to sign-in via the Los Rios Single Sign On page.
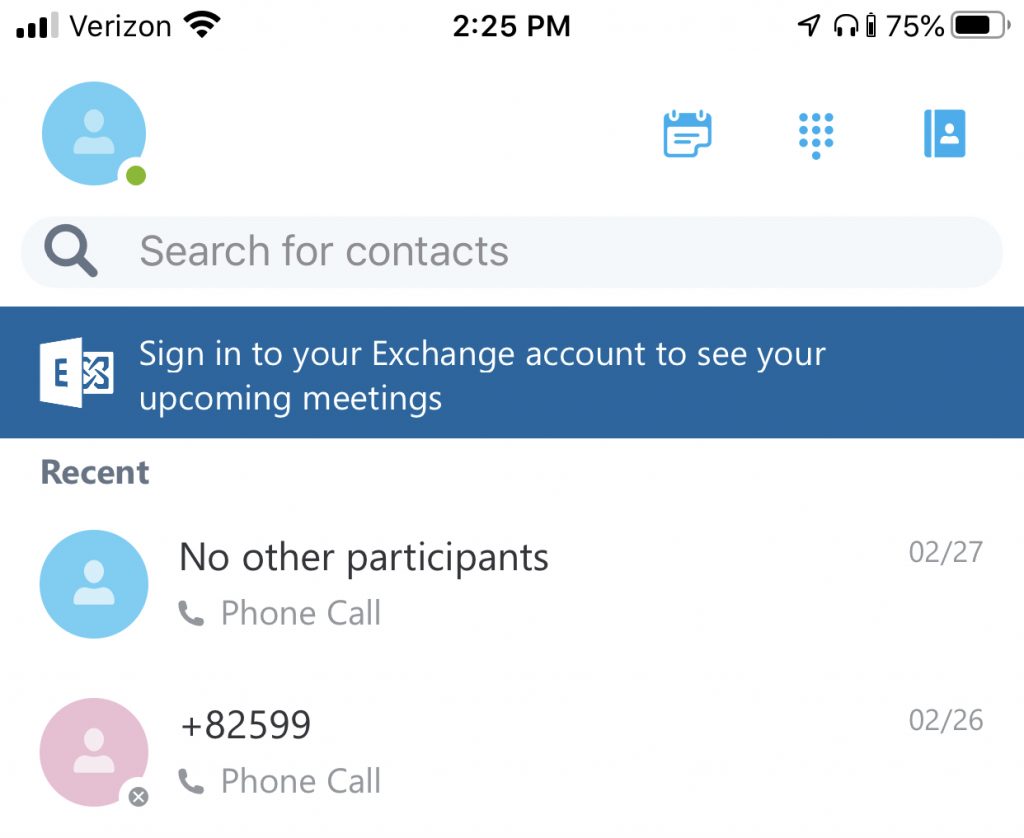
7. User your W-ID in the Username field and your Los Rios password in the field below. Once completed, you will have access to your upcoming meetings and voicemail via the Skype for Business app on your mobile device.